


Contents
- The user interface

- Customize the toolbar
- The low-pass filter
- The band-reject filter
- Direct frequency deleting
- The mixed technique
- Work with the power spectrum
- How to use the program (the workflow)
- Batch processing
- The menu commands
The user interface
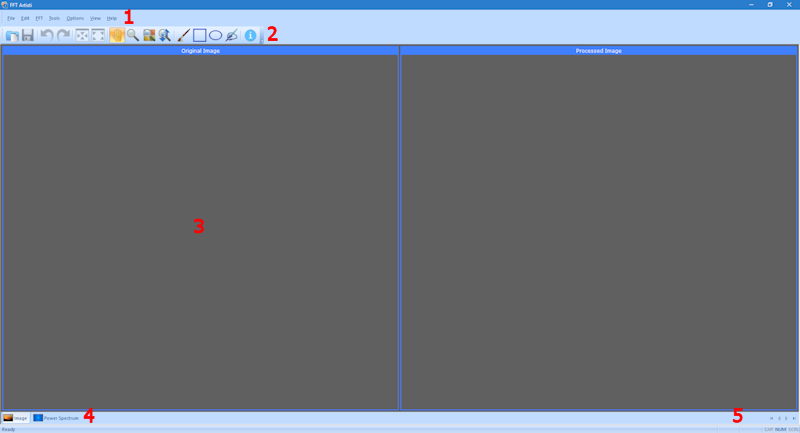
The user interface is divided in 5 parts:
- 1. The menu bar
- 2. The toolbar
- 3. The main window
- 4. The Image/Power Spectrum selection tab
- 5. The image coordinates indicators
1. Menu bar
The menu bar contains the commands of the program.
2. Toolbar
The toolbar provides shortcut buttons for the most useful commands of the program.
The program allows the users to add and remove toolbar buttons, so it fits their tastes and preferences.
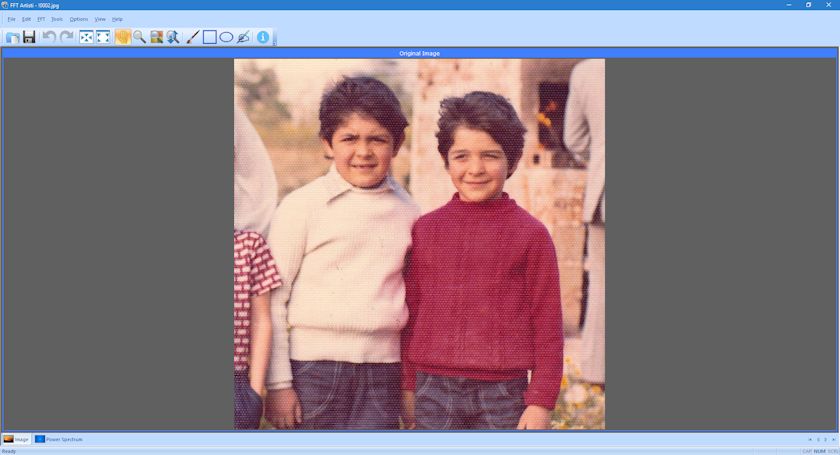
3. Main window
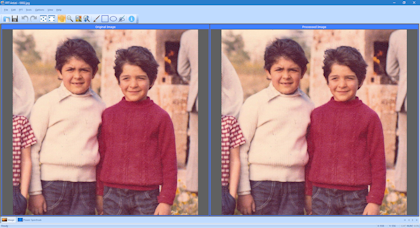
The main window is the working area of the user. The main window displays the loaded image (Image mode), or the power spectrum of the loaded image (Power Spectrum mode). The user can select the mode of the main window from the Image/Power Spectrum selection tab (4). In the Image mode the program can display the original image, the processed image or both the images. The user can use the View menu commands to select the content of the Image mode. The Power Spectrum mode is the working mode of the program. In this mode the user can modify the power spectrum in order to eliminate the pattern noise of the image.
The user can use the View menu commands to select the content of the Image mode (original, processed, both)
4. Image/Power Spectrum selection tab
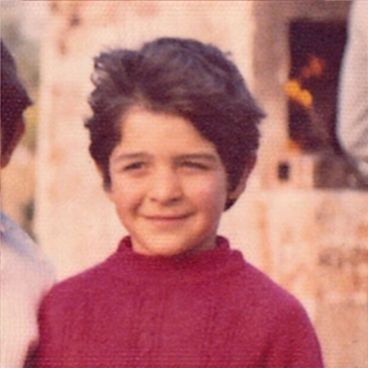
If the tab "Image" is selected the main window displays the loaded image (Image Mode).
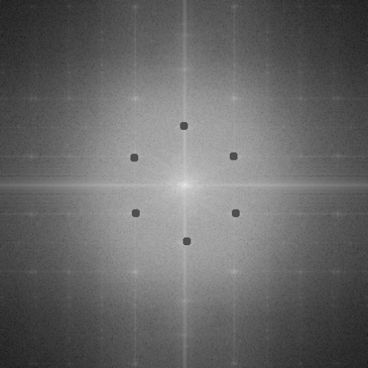
If the tab "Power Spectrum" is selected the main window displays the power spectrum of the loaded image (Power Spectrum mode).
| Image View | Power Spectrum View |
 |
 |
5. Image coordinates indicators
When the user moves the mouse cursor over the image, these indicators show the coordinates of the image's pixel under the cursor.
Back to contents
Customize the toolbar
The program allows the users to add or remove toolbar buttons, so it fits their tastes and preferences. Any toolbar can be quickly customized with the "Add or Remove Buttons" submenu available from the chevron button when it is docked or with a special button in the toolbar caption when it is in the floating state.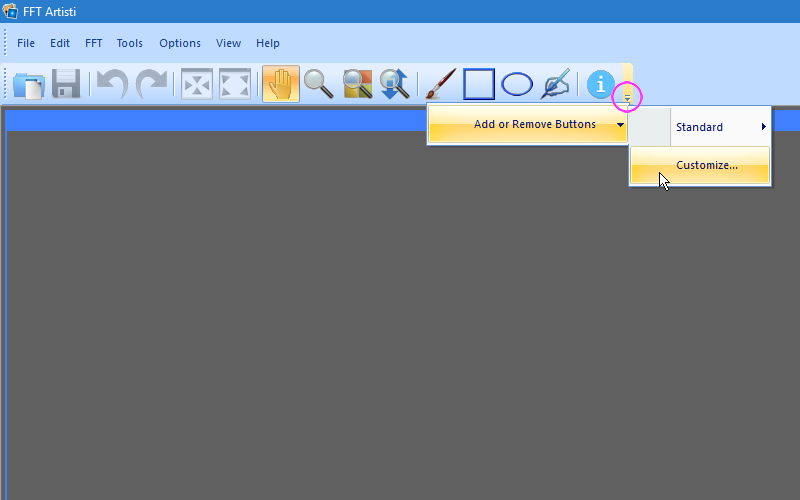
By selecting the menu item "Customize" a dialog box appears and allows the user to drag-and-drop buttons from the dialog box to the toolbar. It allows also the user to drag buttons out of the toolbar, in order to remove them.

Back to contents
The low-pass filter
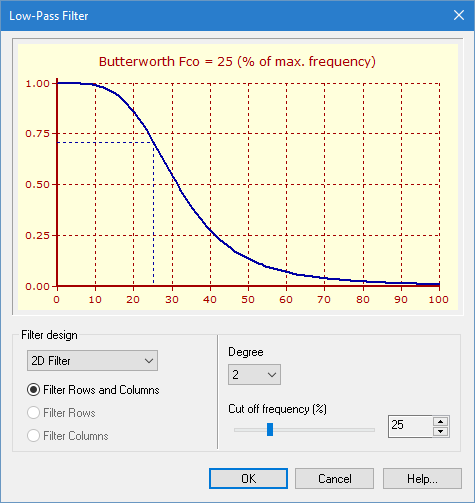
The dialog box of the low-pass filter design allows the user to design a filter that eliminates the high frequency noise.
This filter is named "low-pass" because it allows the low frequencies to remain the same and at the same time the high frequencies are destroyed.
The zero value of the horizontal axis represents the center of the image and the 100% represents the edge of the image. In the center of the image there are the low frequencies and in the edge of the image there are the high frequencies, thus the zero value also represents the low frequencies and the 100% represents the high frequencies.
In the vertical axis the value "1.0" indicates that the frequencies will remain the same and the value "0.0" indicates that the frequencies will be destroyed. As the value "1.0" is in the center of the image, the low frequencies will be remain the same. And as the value "0.0" is in the edge of the image the high frequencies will be destroyed. For the intermediate vertical axis values the corresponding frequencies will be decreased accordingly.
By selecting the cut-off frequency of the filter, we select which frequencies will me remain the same and which frequencies will be destroyed. We select the cut-off frequency according to how long the extra stars of the pattern noise abstain from the center of the image. The filter must have a zero or a near zero value in the position of the pattern noise frequencies.
The degree of the filter determines the slope of the diagram, namely how fast the diagram goes to the 0.0 value.
The diagram shows the filter from the center to the edge of the image, this is the half dimension of the image. We design the half filter because the power spectrum is symmetrical in horizontal and vertical axes, and we can use the same half-filter for all the 4 quadrants of the image.
The 2D filter is a circular filter and it is applied to the rows and to the columns.
The 1D filter is a linear filter and it can be applied in rows or in columns or in both of them.
| 2D band-reject filter | 1D band-reject filter applied in both rows and columns |
 |
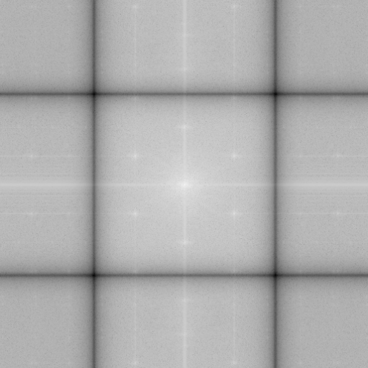 |
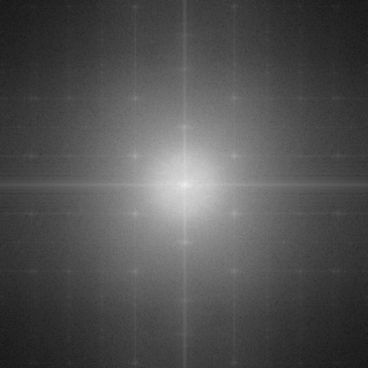
After the low-pass filter application the power spectrum becomes brighter in the center and darker in the edges, that is because the high frequencies have now smaller values.
| Before the low-pass filter application | After the low-pass filter application |
 |
 |
Back to contents
The band-reject filter
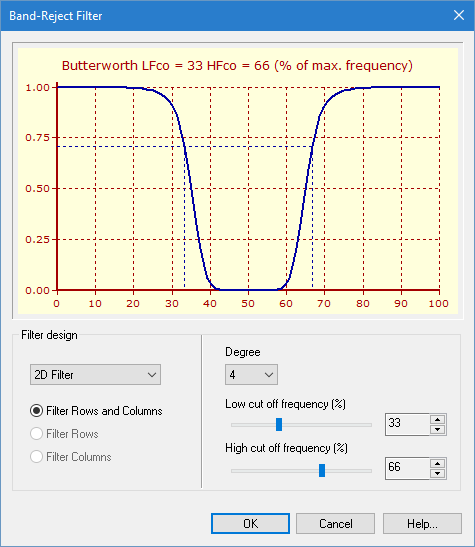
The band-reject filter is very similar to low-pass filter, but instead of high frequencies, it eliminates the middle frequencies between the low cut-off frequency and the high cut-of frequency. This filter can protect the image details in high frequencies if the frequencies of the pattern noise are in the middle part of the power spectrum.
Back to contents
Direct frequency deleting
The user can delete directly the frequencies of the pattern noise with two ways:
1. With the usage of the brush tool and clicking on the pattern noise stars.
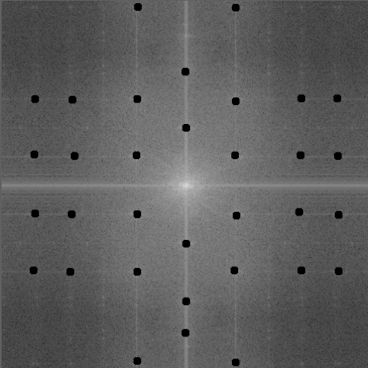
| The original power spectrum | With some of the stars of the pattern noise deleted |
|
 |
2. By selecting an area with pattern noise with one of the selection tools and pressing the <Delete> keyboard button.
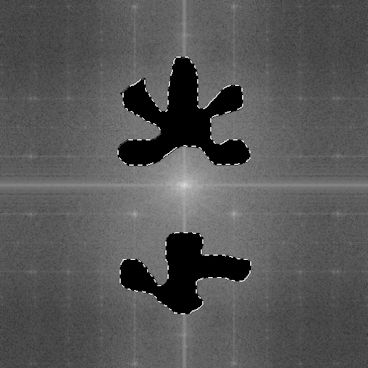
| The selected (with the free hand selection tool) and deleted area | The final result |
 |
 |
The user can select more than one areas by pressing and keeping down the <Ctrl> keyboard key.
Back to contents
The mixed technique
If the pattern noise is very close to the center star, an application of a low-pass filter can drive to a blurred image because the filter will delete the fine image details except of the noise. On the other hand, deleting directly the noise frequencies can drive to a rough image. The user can use a mixed technique, he/she can delete with the brush the stars that are too close to the center, and then he/she can apply a low-pass filter with a cut-off frequency far away from the center in order to eliminate the rest of the pattern noise without fine details losing.| The power spectrum processed with the mixed technique | The result of the mixed technique |
 |
 |
Back to contents
Work with the power spectrum
In the color images the program displays three power spectrums, one for the red channel, one for the green channel and one for the blue channel. These power spectrums usually are identical and for that reason when the user deletes a star in one power spectrum, the program automatically deletes the same star from the other two power spectrums as well. Also it applies the low-pass and band-pass filtering in all the spectrums. If the user wants to process only one power spectrum he/she can uncheck the checkbox on the upper-left corner of the other two spectrum's window and the program will ignore these power spectrums. The program always applies all the the modifications only in the power spectrums that have their checkbox checked. With this way the user can process one, two or all the three power spectrums according to his/her needs.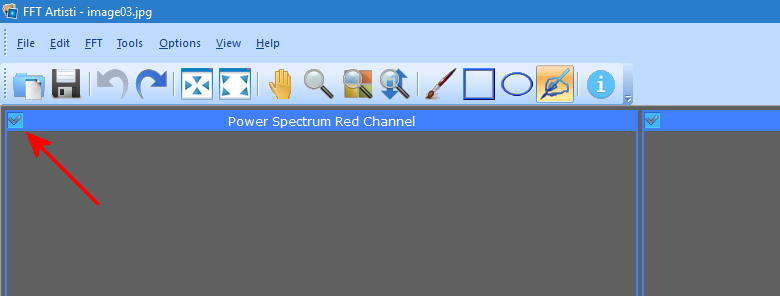
Back to contents
How to use the program (the workflow)
1. select the menu command "File
2. select the menu command "View
3. select the menu command "FFT
4. select the menu command "Tools
5. select the menu command "FFT
6. select the menu command "View
7. if you are not satisfied from the processed image, select the menu command "Edit
a. The user can select the step (3) or the step (4) or both, according to the characteristics of the pattern noise.
b. The user can select the brush size with the menu command "Options
Back to contents
Batch processing
If the user has many files with the same characteristics, he/she can batch filter all the files within a folder. The user can design a filtering strategy with the program and then with the menu command "File
Back to contents
The menu commands
File |
|
||||||||||||||||||||||||||||||||||||||||||||
Edit |
|
||||||||||||||||||||||||||||||||||||||||||||
FFT |
|
||||||||||||||||||||||||||||||||||||||||||||
Tools |
|
||||||||||||||||||||||||||||||||||||||||||||
Options |
|
||||||||||||||||||||||||||||||||||||||||||||
View |
|
||||||||||||||||||||||||||||||||||||||||||||
Help |
|
Back to contents